(Note: To follow this procedure, you must have a PC running Windows as the Operating System):
You will need to use an additional Microsoft command-line tool, called Oscdimg.
Oscdimg is a command-line tool for creating an image file (.iso) of a customized 32-bit or 64-bit version of Windows.
Read more about Oscdimg here.
Steps to follow:
1 Create 3 folders into your C:\ drive (i.e. c:\windowsiso c:\windowsexe c:\windowsdvd).
2 Download oscdimg.zip and extract it into the c:\windows7exe folder created previously.
3 Now put the windows .iso which you have already downloaded into the c:\windowsiso folder. Then extract all files and folders of the .iso using a software such as winrar, ultraiso, imgburn
etc.
4 When the extraction is finished, remove the .iso file from the c:\windowsiso folder.
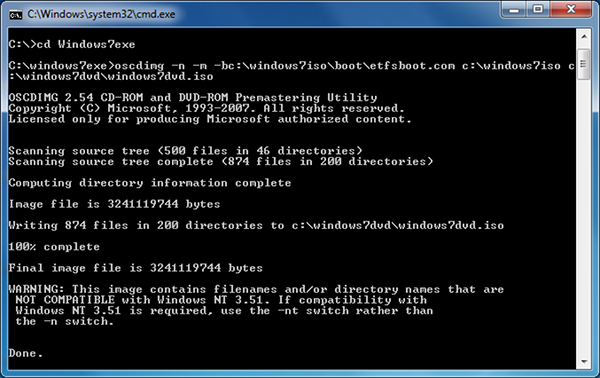
5 Open a DOS Prompt and move into the folder c:\windowsexe and then enter the following command:
oscdimg -n -m -bc:\windowsiso\boot\etfsboot.com c:\windowsiso c:\windowsdvd\windowsdvd.iso

Enjoy your new Windows bootable DVD!


Hi Michael,
Awesome Post! Thanks for sharing this unique post on how to create a bootable Windows DVD easily. And I really liked the content you have provided using cmd. Keep up the Good work… Keep Sharing…
Cheers,
Vikas
If you want to get a more similar end product (iso file) to what you would get from Microsoft, use this instead:
oscdimg -uv -u1 -l(volumelabel) -bc:\windowsiso\boot\etfsboot.com c:\windowsiso c:\windowsdvd\windowsdvd.iso
where you would want to change the (volumelabel) part to whatever you would want your iso’s volume label to be, ex:
CCSA_X64FRE_ES-MX_DV5 <=== that's the volume label for Windows 10 64 bits in Mexican Spanish, but you can write whatever you want.
This is a great post! I’ve used oscdimg for ages for building all sorts of .iso files, but I thought that Windows 7 and later only used UDF and didn’t include the ISO9660 anymore. I built stuff mostly with -u2. I always wondered whether they used -d -n for 8.3 filenames and allow lower case. Don’t you find it weird that all these Mac morons are using this Windows tool to build a bootable Windows DVD to run on a Mac to install Windows???!?
Contrary to what José Luis has said above, which is simply WRONG in many ways, I thought I’d share with people the *PROPER* way to build a Windows 10 bootable .iso file from files.
Firstly, José is wrong about the Windows 10 DVD being ISO9660/UDF. It’s NOT. It’s a UDF1.02 ONLY file system on the DVD. Now the correct command to create a completely bootable Windows 10 .iso file is as follows:
oscdimg -u2 -m -udfver102 -o -l -bootdata:2#p0,e,b\etfsboot.com#pEF,e,b\efisys.bin
Now both the etfsboot.com file can be found in the boot directory on the DVD and the EFI boot application can be found in the efi\Microsoft\boot folder. Using the above command will generate you a properly bootable Windows 10 BIOS/UEFI bootable .iso file. Ignore what everyone else has said here, they’re simply WRONG.
This stupid website removed all of the formatting from the command… here it is properly formatted.
oscdimg -u2 -m -udfver102 -o -l*VOLUMENAME* -bootdata:2#p0,e,b*PATH_TO_BOOTFILE*\etfsboot.com#pEF,e,b*PATH_TO_BOOT_APPLICATION*\efisys.bin *SOURCE_FILES* *DESTINATION_FILE*
Obviously replace VOLUMENAME, PATH_TO_BOOTFILE, PATH_TO_BOOTAPPLICATION, SOURCE_FILES, DESTINATION_FILES with the correct values.
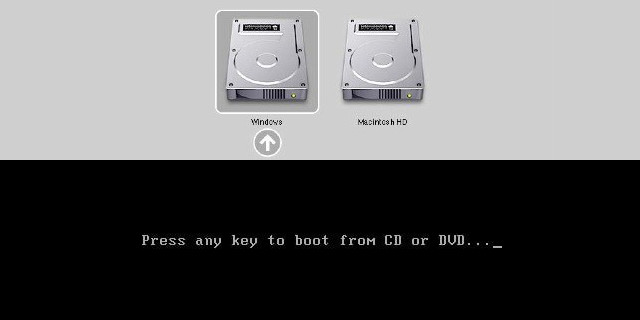
I followed the procedure and then booted on the newly-burned DVD on my 2006 macbook2,1. After “press any key to boot on CD / DVD” (and obviously pressing a key) the light blue Windows 10 logo appears and the screen stays like that forever…
My bad!!!
It stays like that for a very long time but then the install procedure starts…
Sorry for the inconvenience and ignore my previous comment.
Best,
-a-
OMG the above instruction created a fully bootable dvd. I can now install windows along side of my mac using bootcamp. Thank you sop very very much.
The created iso is not even readable by MagicISO, so I think it is not useful.. Anyway thanks
This article doesn’t really explain why you would do this. For more context, see http://glennstevenson.com/Blog/TabId/1115/PostId/4/Install-Windows-7-64-Bit-On-Mac-Pro.aspx; however, the instructions there are incorrect, the instructions here are correct.
The purpose of this is to make a 64bit install disk bootable on a Mac Pro 1,1 or 2,1. These computers have a 64bit processor but a 32 bit EFI, so they don’t recognize install disks for 64bit Win7 or above as bootable. However, they are perfectly capable of running a 64bit OS and in fact came stock with one. With a 64bit OS they can use up to 32GiB of RAM. These machines are exceptionally inexpensive considering that in 2007, the MP 2,1 was one of the best production desk tops available.
What I do wish is that the article would explain how this works. The documentation on `oscdimg’ is severely lacking. The action described both here and at the link I’ve provided doesn’t really say what `oscdimg’ is doing to make the iso different from the one obtained from Microsoft.
yeah, I’d like to know about that…
Here’s the problem here… Firstly, oscdimg is being distributed here as a standalone application. I cannot fathom why anyone would do this (well, it’s probably for the benefit of the Mac Morons), but it is *NOT* supposed to be distributed this way. This tool comes as part of the Windows AIK and that is where you will find its documentation. Oh and Mac users wouldn’t understand the technical explanation as to how oscdimg works, even if I gave one. (But if you look at the image closely, you can see exactly what it’s doing!)
Oh, and I’m sure there are other customizations one might make, though I’m not sure what they’d be. But the bottom line is that this *does* work, contrary to the first comment.