Follow these simple steps in order to create a bootable USB drive from your MAC computer:
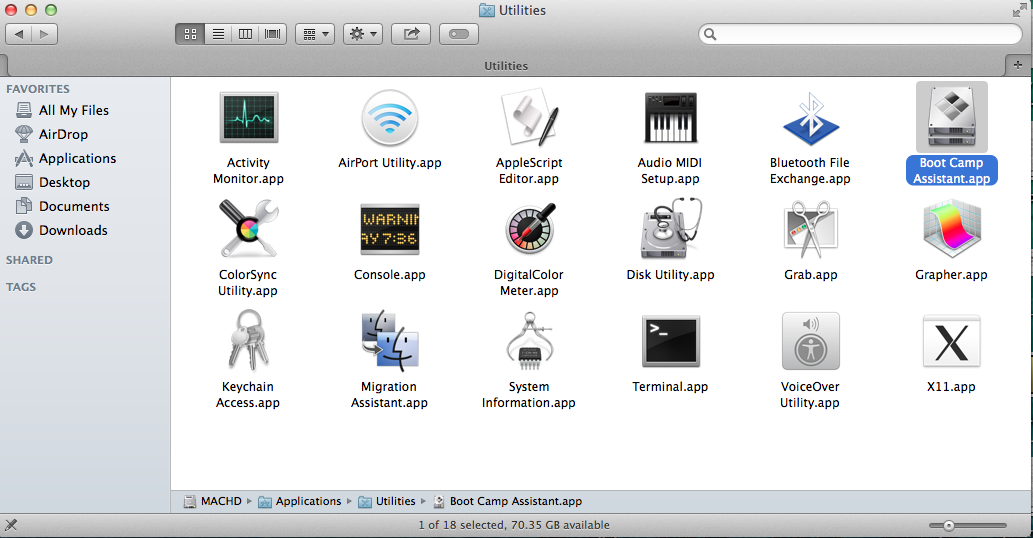
1 On your MAC go to your Applications > Utilities and double click on the Boot Camp Assistant.Requirements:
- Windows 7/8 x64 iso (Note: x86 and Mixed iso files are not supported)
- At least 8GB USB memory stick
- Your MAC computer
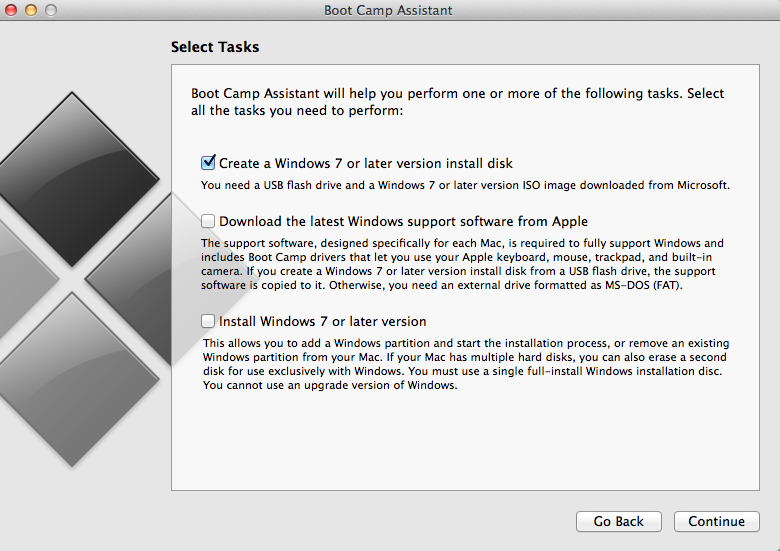
 2 When Boot Camp Assistant loads, on the first screen click Continue and then select only the first option which says “Create a Windows 7 or later version install disk” and click Continue.
If you do not see this option move to the next step, otherwise go to step 8.
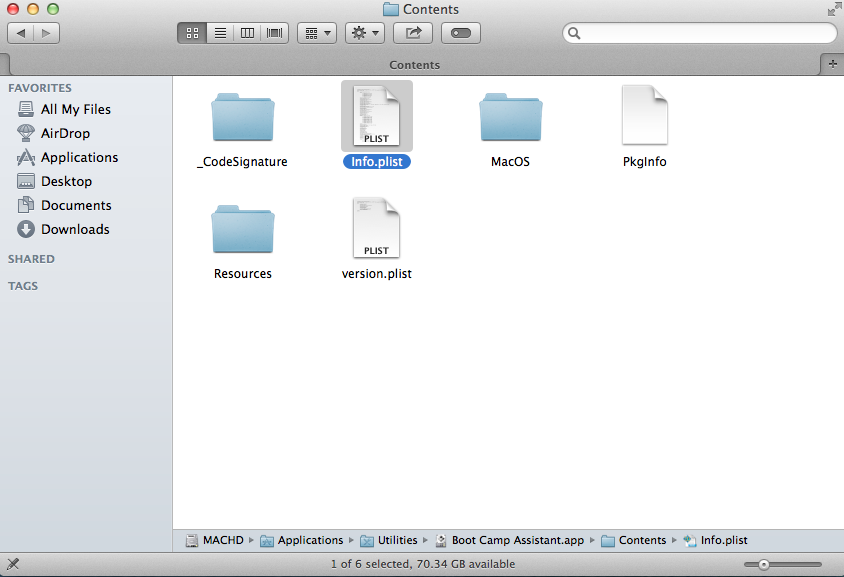
Do this in order to have a backup of this file in case something goes wrong after editing this file.
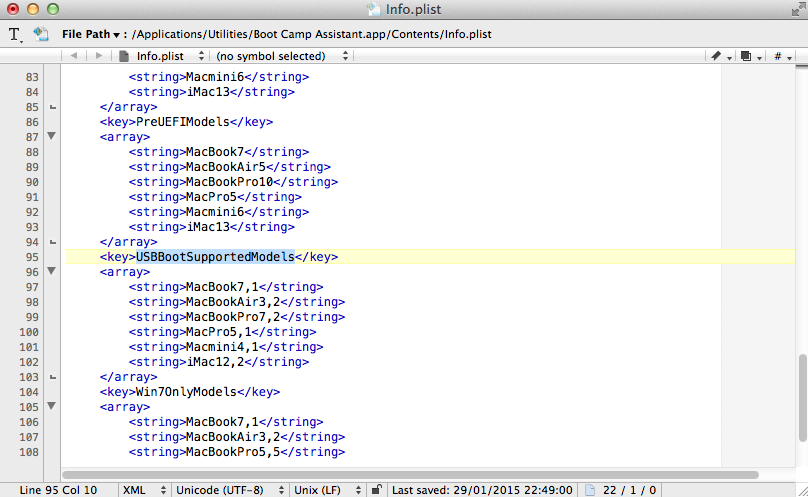
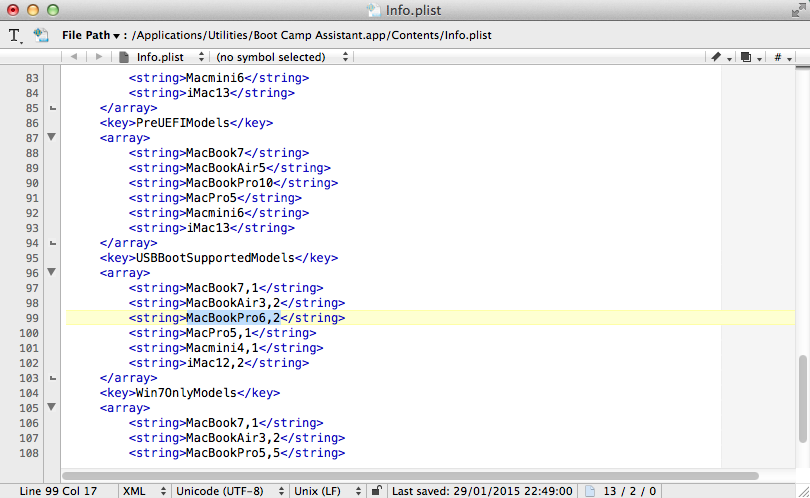
Underneath USBBootSupportedModels you will see the declared versions of MAC computers (i.e. MacbookPro7,2 , iMac12,2 etc) that support Creating bootable USB drives. The word (i.e. MacbookPro) indicates the Model of the computer and the number (i.e. 7,2) the version.
If you see your computer’s model in this list, it means that your computer version is older than the declared number.
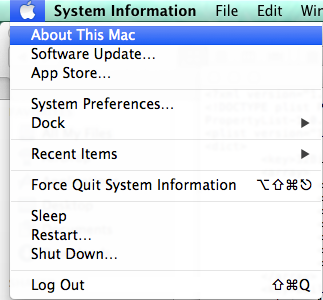
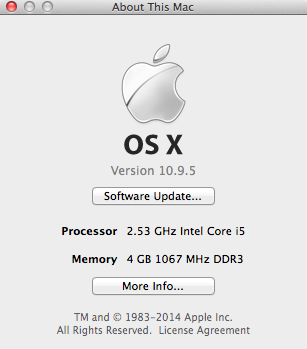
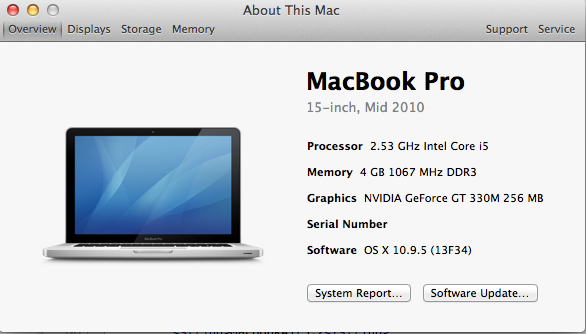
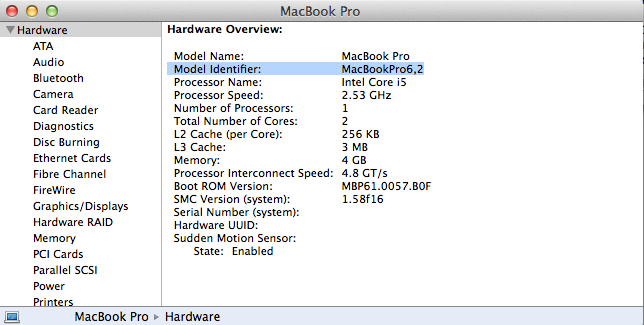 6 Then Copy the Model Identifier and paste it in the Info.plist file under the PreUSBBootSupportedModels key.
Make sure that your computer model is written on the list only once (i.e. If your Model exists replace it with the correct number and do not make a duplicate with two different model numbers).
Finally Save the Info.plist file (You may requested to login in order to save the file).
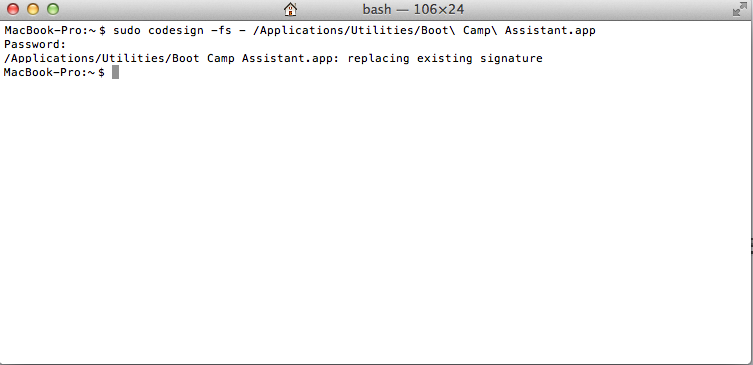
Then write the following command into Terminal (it will ask you to enter your mac password to proceed). This command resigns the Boot Camp Assistant so that it runs with the new Info.plist.
sudo codesign ‐fs ‐ /Applications/Utilities/Boot\ Camp\ Assistant.app
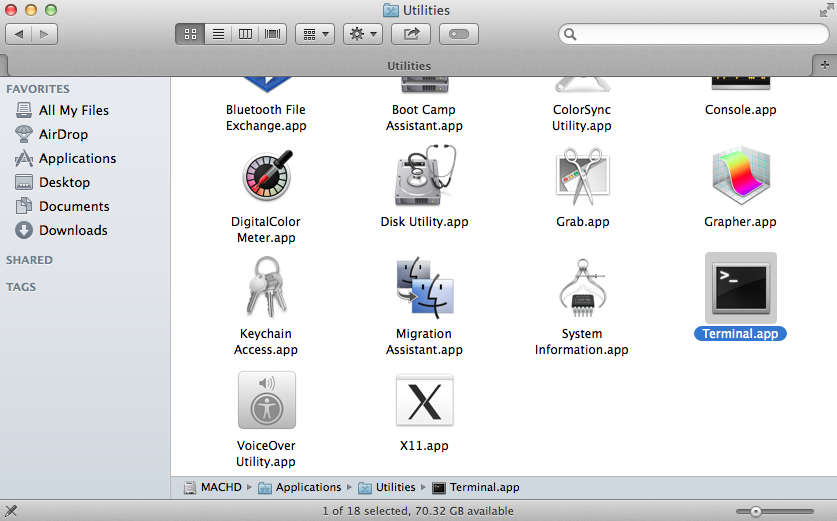
8 On the Boot Camp Assistant with the “Create a Windows 7 or later version install disk” selected, click Continue. It will ask you to plug in your USB memory stick if it is not already plugged in.
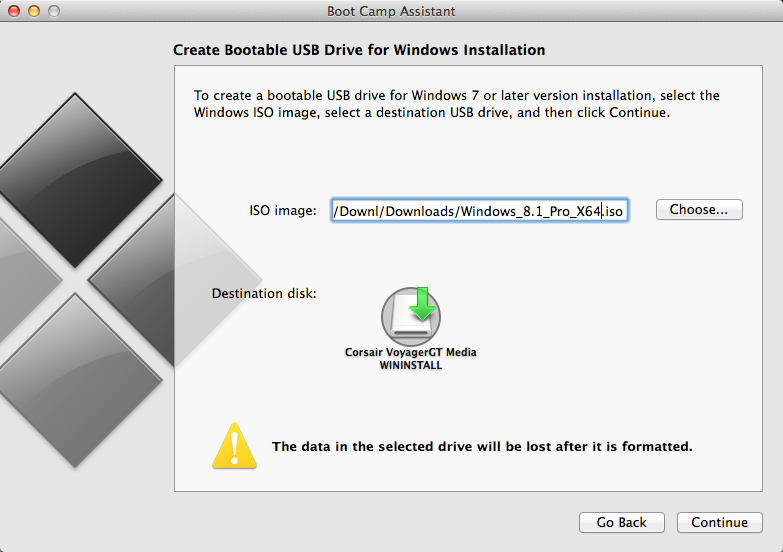
Then locate the .iso file on your mac and click Continue (Note: All Data will be lost from your Memory stick).
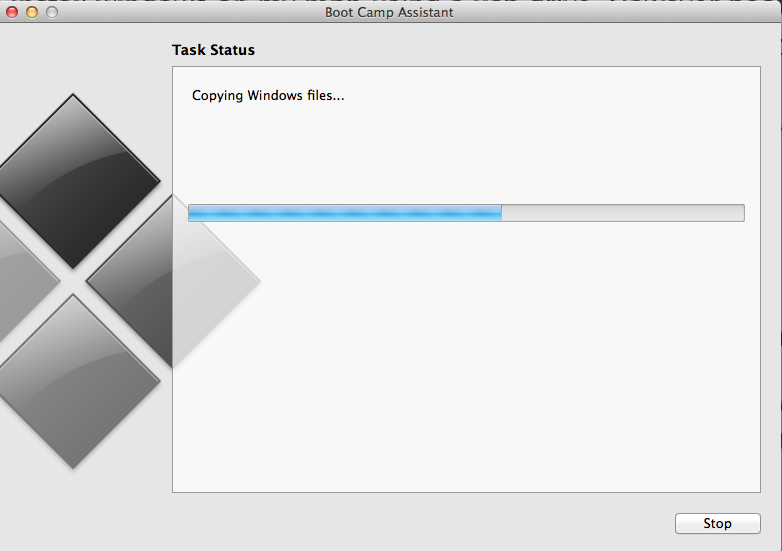
9 Finally wait for the process to finish and you are DONE.
Enjoy!!

Well disabling SIP in newer versions of OS, eg: 10.13 High Sierra can be painful, and there’s no need for it. You may need to alter permissions to the file as well, then copy Info.plist to Desktop alter it there and after saving it replace it.
On MacOs Sierra before i could edit the plist.txt file, I had to disable SIP first:
https://apple.stackexchange.com/questions/208478/how-do-i-disable-system-integrity-protection-sip-aka-rootless-on-os-x-10-11
Then use in terminal:
sudo nano /Applications/Utilities/Boot\ Camp\ Assistant.app/Contents/Info.plist
On MacOs Siera use this codesign command:
sudo codesign -s – -f /Applications/Utilities/Boot\ Camp\ Assistant.app/
Created bootable USB like You mentioned, however Mac does not see it to boot (Holding Alt during boot). reFInd see it however unable to boot it as well. I see that You also use Mid 2010 MacBook which has problems booting from flash with not GPT partition. How You turned this on to success?! Any way to solve or I did something wrong? Have Mac OS Sierra.
Thanks!
I have the exact same combination, and the USB-stick does not appear to be bootable on the Mid 2010 MacBook. Did you find a solution?
I have the same problem
This worked great in getting Boot Camp Assistant to create my USB, but upon reboot-with-option, when I choose the “EFI” disk to boot from, my Early 2008 MacBook Pro freezes and goes no further. The mouse does not move, nothing happens. Any suggestions?
Hello. Thank you for the guide! After completing all the steps i have the following strange thing. The system doesn’t recognise the usb as bootable and i dont see it at the boot options. I have tried in 2 different usb drives. Any ideas?
Same here, I’ve followed all the steps that I should do, and I couldn’t see the WININSTALL usb on my macbook screen after I’ve pressed option key
Same thing here. Is there a solution to having the system recognize the USB as bootable after completing the above steps?
I had a bunch of permissions problems trying to alter the plist, but they were easily fixed by copying Boot Camp Assistant to the desktop, altering the one on the desktop, re-signing it with the Terminal command mentioned above, then running it from the desktop.
Thanks for the article and tip! I’ve got Win7 installing smoothly to a flash drive right now!
Thank You!!! That tip worked for me
1. Copied the Bootcamp app to the desktop
2. Opened a copy of the Info.plist
3. Removed Pre from PreUSB name
4. Added my Macbook model identifier
5. Copied over the modified Info.plist file over
6. Light click and more info on BootCamp app to get exact location
7. Ran the terminal command with updated location
I was trying to create this on OS X Sierra and ran in to these permission problems as well. Thank you for the tip! Works like a charm now.
On El Capitan, even with a correctly edited info.plist, the option “Create a Windows 7 or later version install disk” does not exist.
If you’re having issues on Mac OS El Capitan or later, you need to first reboot into Recovery Mode (hold CMD+R on boot) and open the terminal (under utilities.) Once in the terminal there’s no need to sudo, as you’re already in root. Type the command “csrutil disable” without quotes. This will allow you to edit system files like the Bootcamp’s Info.plist. After you’ve finished your install of Windows I highly recommend booting into recovery and using the command “csrutil enable” as this will re-enable System Integrity Protection. This will prevent any malware that might gain access to root from doing any severe damage to the system. (It will also restrict your abilities as root as well, however.)
I DONT UNDERSTAND
i have el captain and i can edit the info plist but i don’t get how to save it as an iso image.
i open boot camp and try selecting it. it doesn’t work that way.
HELP
Easy fix for the command line that doesn’t change the signature.
Just copy the content folder from the boot camp on the Desktop. (You need to open the folder from finder).
Open the folder MacOS then click on Boot Camp Assistant (Black icon) and follow the steps from 8.
I followed all the steps but after executing the command in Terminal, Boot Camp Assistant simply doesn’t open. Please help.
Heads up! After a while of errors, the correct string that worked for me was:
sudo codesign -fs – /Applications/Utilities/Boot\ Camp\ Assistant.app
Hi, thanks for the gide. I am able to create the USB stick. The I plug it in to a PC and it does not boot up. It get stacked with the cursor blincking, usb stick light blinking, ans nothing happens. I got here looking for the way to create a bootable windows installer USB for PC from osx. Should it work? If not. Do you know about a different guide?
Thanks a lot for your help
Hi
MacOS X 10.11.2 (aka El Capitan) don’t let us to edit Info.plist at all.
I tried to edit it with “sudo nano”, duplicate the file on my desktop and try to replace with Finder, or edit the file directly with Sublime Text.
You have to duplicate Boot Camp Assistant Application in your desktop (or anywhere else) to be able to edit it.
Hope this helps !
Another way to do this is to turn off System Integrity Protection in El Capitan. (I tried to duplicate and replace Info.plist, but I couldn’t get the right permissions for it no matter what I did.)
If anyone else is having this issue, restart your computer in recovery mode by holding down COMMAND + R as it’s booting. In the menu bar, click on Utilities, then open the Terminal.
Type the following line exactly and then hit enter:
csrutil disable
Then restart your computer normally, and edit the plist.
To reenable system integrity (which you might as well, for safety), restart in recovery mode again, and this time type the following line into the terminal:
csrutil enable
Then you can follow through with the rest of this solution.
I found a very very easy fix for this using El Capitan. Just copy Bootcamp to your desktop. OSX lets you edit the info.plist. Then just run the copy from your desktop!
Easier solution is to select Get Info from the context menu for the info.plist, unlock using the little lock icon at bottom-right, then add your username to permissions list and select Read & Write permissions. OSX will now let you edit the plist file.
Does this put windows on my mac OR does it only let me use a mac to create a windows bootable usb (i.e.: does not affect my mac software)?
I have a PC that needs Windows. I have an ISO file and a macbook. Can I use the instructions above to use my mac to create a bootable USB which I’ll put in my corrupt PC? I DO NOT want Windows on my mac.
It is exactly what you are looking for. Following the instructions you will be able to create a Windows bootable USB drive from a MAC which can be used in any pc.
Hello Mike
I do not see Step 2: “Create a Windows 7 or later version install disk” on my MacBook running OS X El Capitan. How do I enable this?
ditto