Follow these simple steps in order to create a bootable USB drive from your MAC computer:
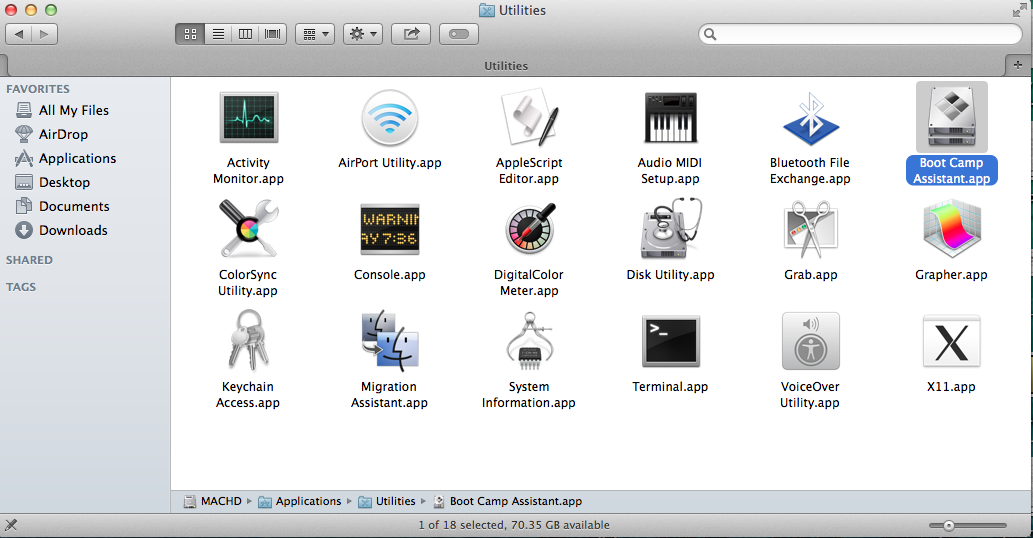
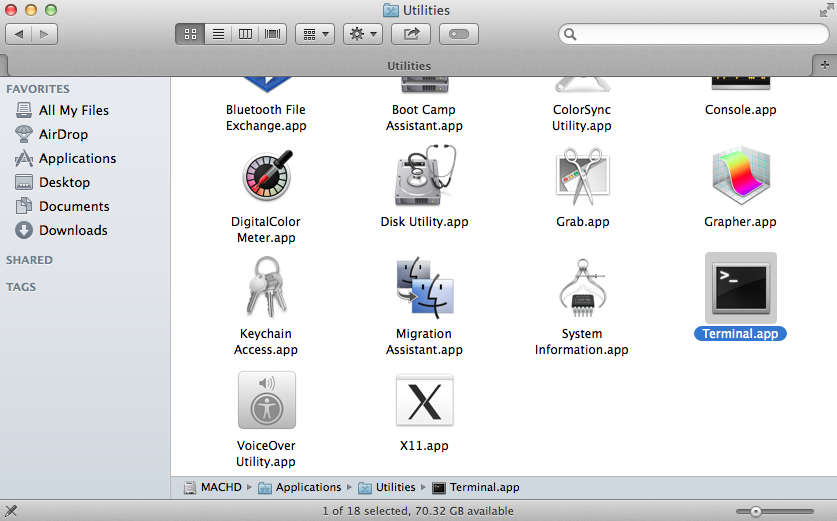
1 On your MAC go to your Applications > Utilities and double click on the Boot Camp Assistant.Requirements:
- Windows 7/8 x64 iso (Note: x86 and Mixed iso files are not supported)
- At least 8GB USB memory stick
- Your MAC computer
 2 When Boot Camp Assistant loads, on the first screen click Continue and then select only the first option which says “Create a Windows 7 or later version install disk” and click Continue.
If you do not see this option move to the next step, otherwise go to step 8.
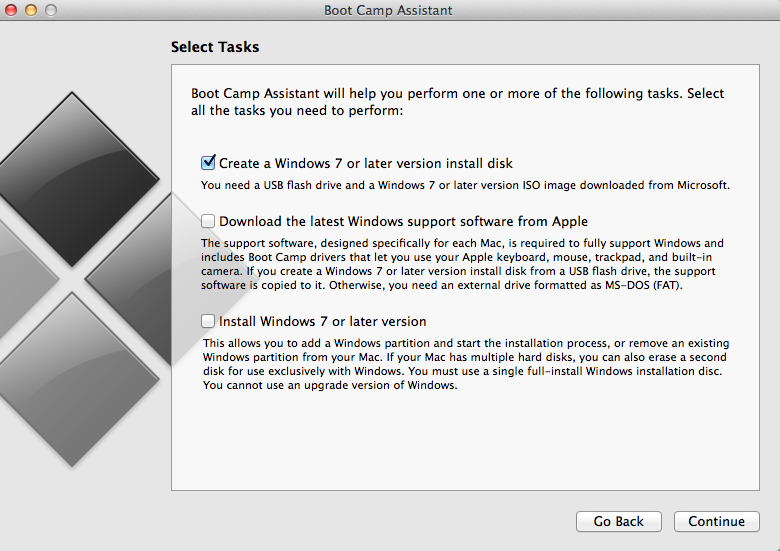
Do this in order to have a backup of this file in case something goes wrong after editing this file.
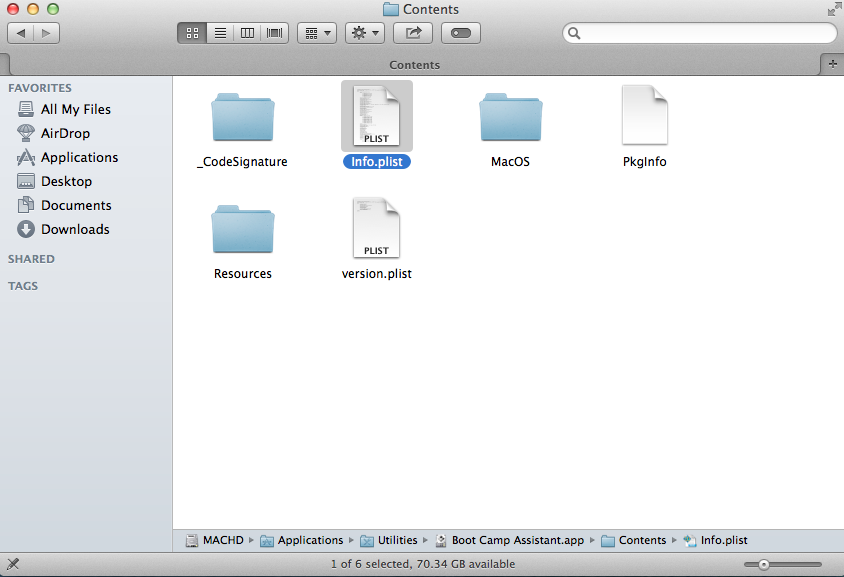
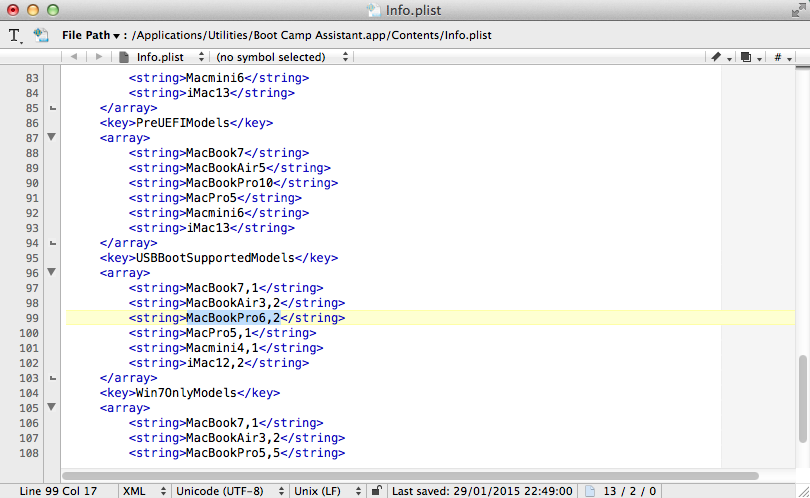
Underneath USBBootSupportedModels you will see the declared versions of MAC computers (i.e. MacbookPro7,2 , iMac12,2 etc) that support Creating bootable USB drives. The word (i.e. MacbookPro) indicates the Model of the computer and the number (i.e. 7,2) the version.
If you see your computer’s model in this list, it means that your computer version is older than the declared number.
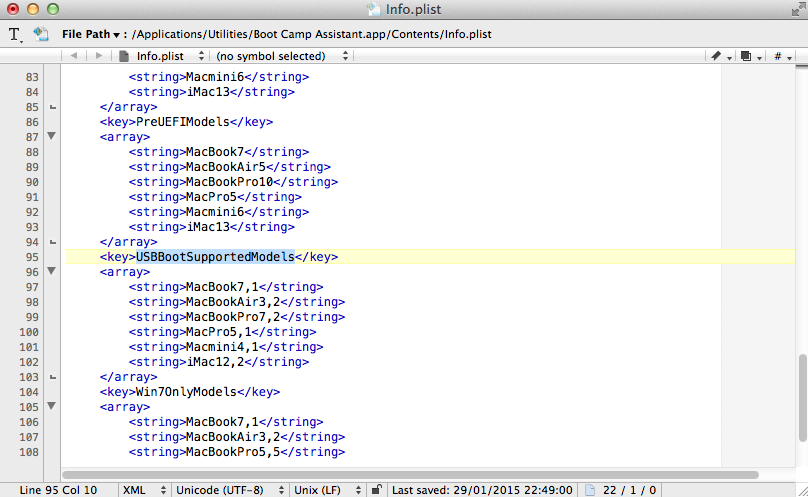
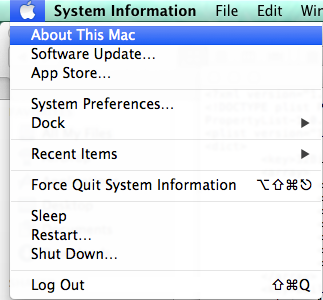
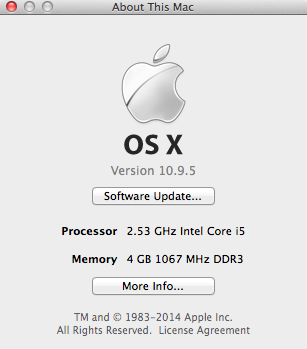
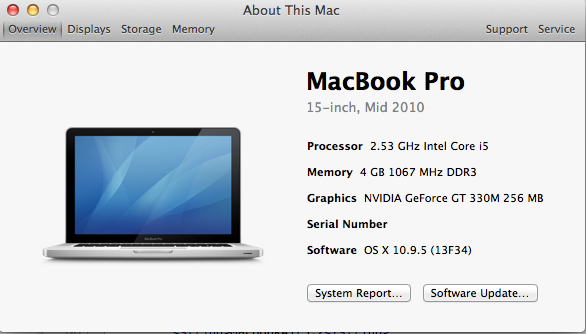
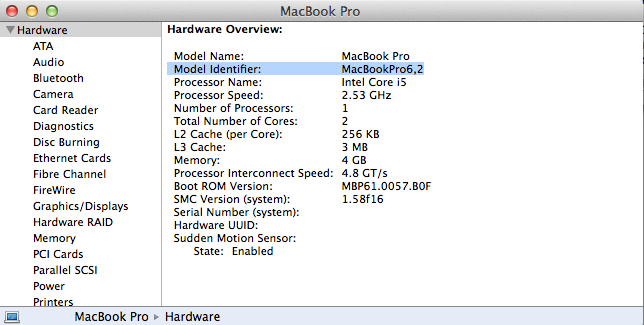 6 Then Copy the Model Identifier and paste it in the Info.plist file under the PreUSBBootSupportedModels key.
Make sure that your computer model is written on the list only once (i.e. If your Model exists replace it with the correct number and do not make a duplicate with two different model numbers).
Finally Save the Info.plist file (You may requested to login in order to save the file).
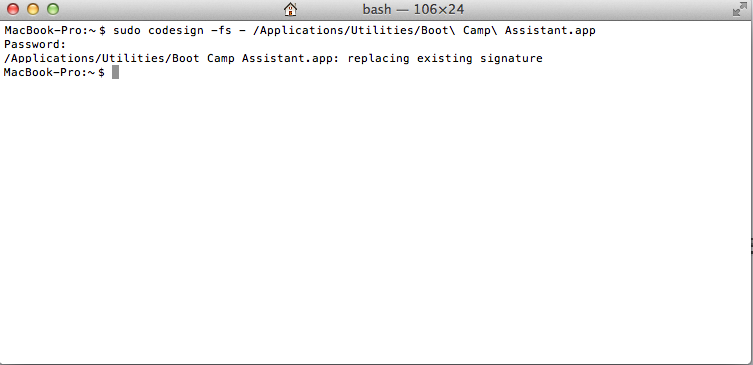
Then write the following command into Terminal (it will ask you to enter your mac password to proceed). This command resigns the Boot Camp Assistant so that it runs with the new Info.plist.
sudo codesign ‐fs ‐ /Applications/Utilities/Boot\ Camp\ Assistant.app
8 On the Boot Camp Assistant with the “Create a Windows 7 or later version install disk” selected, click Continue. It will ask you to plug in your USB memory stick if it is not already plugged in.
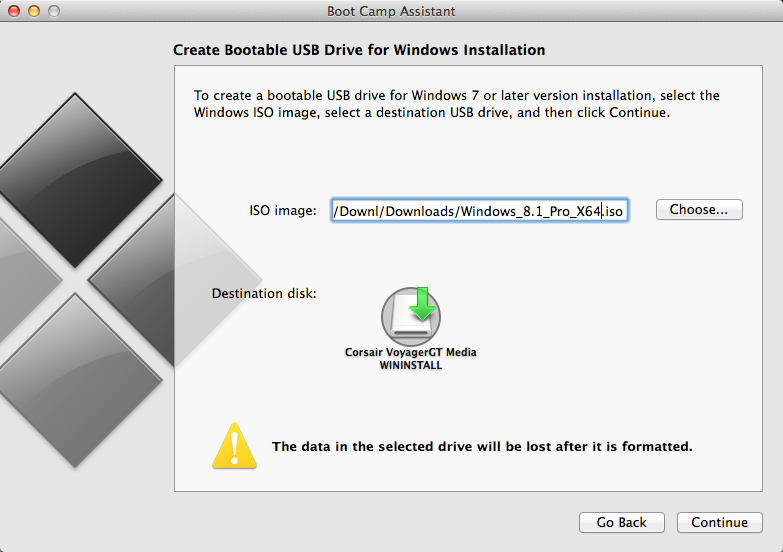
Then locate the .iso file on your mac and click Continue (Note: All Data will be lost from your Memory stick).
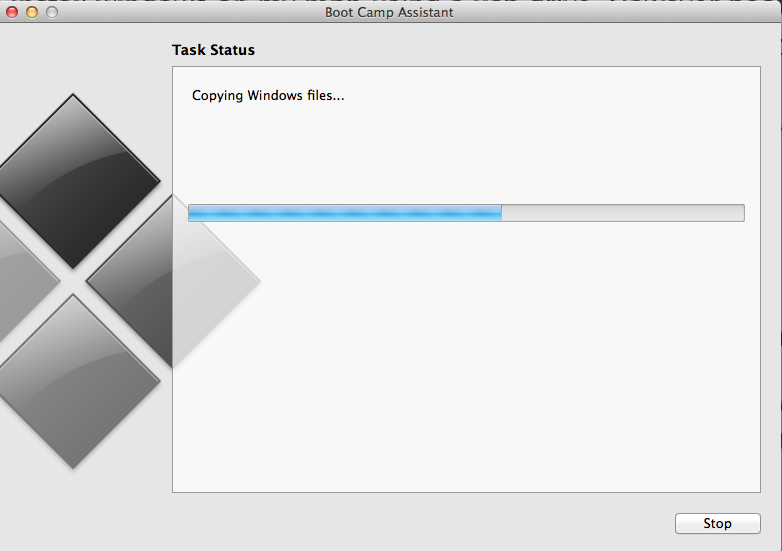
9 Finally wait for the process to finish and you are DONE.
Enjoy!!

Method works great to get the Windows 7 install disk prompt to show but when I go to create the drive it says, “Your bootable USB drive could not be created. Boot Camp only supports Windows 7 installation on this platform. Please use an ISO file for Windows 7 installation. Anyone have the next step?
now i cant open boot camp assistant
when it ask the password i cant write the password i have os x 10.8.5
i just can abort
Great guide, thank you.. I’ve been trying to figure this out for two days now and I think I finally have it working!
Hi,
Thanks for this excellent guide. When I copied/pasted the terminal command in step 7, I wasn’t asked for a password. Instead, I got this:
Usage: codesign -s identity [-fv*] [-o flags] [-r reqs] [-i ident] path … # sign
codesign -v [-v*] [-R testreq] path|[+]pid … # verify
codesign -d [options] path … # display contents
codesign -h pid … # display hosting paths
Am I doing anything wrong?
Thanks again for this guide.
I’m on OS X 10.9.5.
I believe the dash before “fs” in the command also needs to replaced with a hyphen.
The correct string is:
sudo codesign -fs – /Applications/Utilities/Boot\ Camp\ Assistant.app
It has worked for me now.
The -fs string doesn’t fit with the sudo codesign command. I googled it and found the same line of code with the -fs as “-f – s”. I added the space and dash and it worked perfectly.
I also had problems with the permissions; I opened the info window on the “Contents” folder of the app and unlocked it with my password then added myself with the plus (+) sign and gave myself read and write permissions. I did that again on the file itself and had no problems after that (had to run the terminal code again to keep the app from crashing).
Hi guys, Thanks a lot for your helps and sharing your tips. Very helpfull so fare.
I meet a problem right at entering ” sudo codesign -fs – /Applications/Utilities/Boot\ Camp\ Assistant.app “.
I get the following answer from Terminal :
” –: no identity found ”
Would someone know what it means please?
Cheers
That was not the correct string either. The problem was that there should be no hyphens, only dashes (minus character). This is the correct string:
sudo codesign -fs – /Applications/Utilities/Boot\ Camp\ Assistant.app
I have the same problem i have c+p your code into terminal and I get -: no identity found
what does this mean and how do i fix it
nevermind i fixed it, replacing the em dash in your copied code with a hyphen worked
everything works great up until the actual copying of the ISO image on my flash drive. I get an error message about 50% of the way through that says “Your Bootable USB drive could not be created: an error occurred while copying the windows installations files”. any ideas?
Eject any mounted disk before creating.
Thank you so much, this was a huge help. I noticed from your examples that you had a section for USBBootSupportedModels. My plist only had PreUSBBootSupportedModels. I was not seeing a change, but then added USBBootSupported with my model number and it worked.
also, i tried to copy my iso to a flash drive using disk utility, but it says cannot validate source. does that mean my iso file is effed up, or will that method just not work?
the resigning thing must not work with mac os 10.10 because bootcamp assistant still crashes after i change the .plist file. any new workaround?
Hi, Did you get anywhere with this? I’m having exactly the same issue with 10.10.
Cheers
The correct string for OS X 10.10 is:
sudo codesign -fs - /Applications/Utilities/Boot\ Camp\ Assistant.app --deepThank you very much! That fixed it!!
Boot camp never gets further than the ‘copying windows file’ part. It fails after this step. What is wrong?
great guide, but my BCA “create a windows 8 or later install disk” My BCA is version 5.14. Maybe I can downgrade to 5.0??
I am trying to install windows 7 on a 2015 Macbook Air 11″. Now I know the official word from Apple BCA supported models is that My new machine only supports windows 8, But windows 8 sucks for me, and I want windows 7. There must be a way.
I Have a the genuine MS Windows 7 pro DVD, and an official win 7 iso that I payed for.
I followed all of the steps exactly as you wrote them but when I enter in that last commad into the terminal, I get “no identity found”.
Bootcamp then won’t ope when I click it. It just boots up and closes.
check this help, it was helping me:
http://crshd.github.io/2014/11/16/Creating-Windows-USB-on-OSX/
🙂
Did you manage to solve your problem? Your version of Mac is OS X 10.9 (Mavericks)?
I am having the exact same problem. After entering the Terminal command and restarting Bootcamp it now just refuses to run. (According to this guide entering the sudo command in Terminal is to be done while bootcamp is open. When I tried that and went to write my ISO to USB bootcamp would freeze at about 45%. So I tried closing and restarted bootcamp and now it closes immediately upon initiation).
Anybody have an idea how to resolve this?
If you copied and pasted it, the – between -fs and /Applications… is an em-dash when it should be a regular hyphen. Try replacing that character.
Command line fixed. Thanks Andrew.
I use a Mac Pro that does not support Boot Camp Assistant. Any other methods to recommend?
What do you mean? you can’t find boot camp assistant? what version of mac do you have?
Great guide! Worked like a charm! Thanks!
This is exactly what i need . although i have a problem, when doing the Sudo command i can’t type a password, its like the letters of the keyboard are not responding, although enter and crtl+c is working?
Entering your password in Terminal does not really displays it, the same goes in Linux machines.
yes you thought you aren’t typing it but actually, you are typing it.